
So, this was about a 5 week project… updating a 1970's kitchen into something more updated. It was a complete DIY project that cost under $1,500… if you can believe that! And that includes a new dishwasher. It was really outdated and I was really sick of looking at yellow… in most all forms. I couldn't stand the wood cabinets or the yellow Formica counter tops. Living here for 3 years now it was too much for me to handle anymore… and I could envision the beauty it could become. So I decided to tackle it. Of course this is a small kitchen but even a small kitchen is a lot more work than you think it will be. Two weeks in and I just wanted it to be finished.
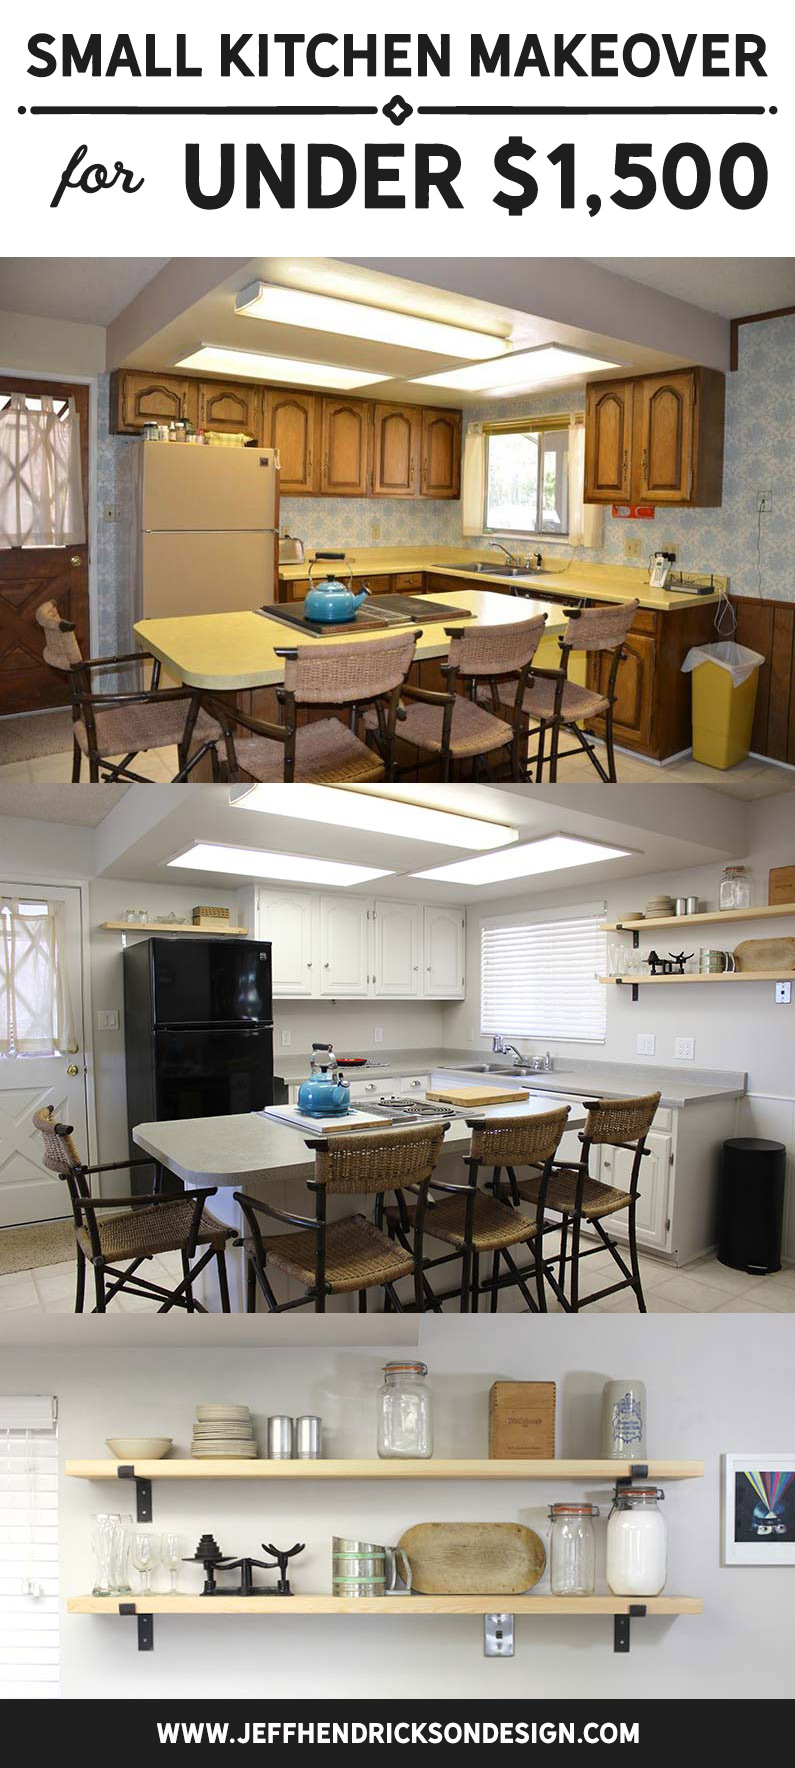
This was the before photo… looks right out of the late 70's right? Yikes!
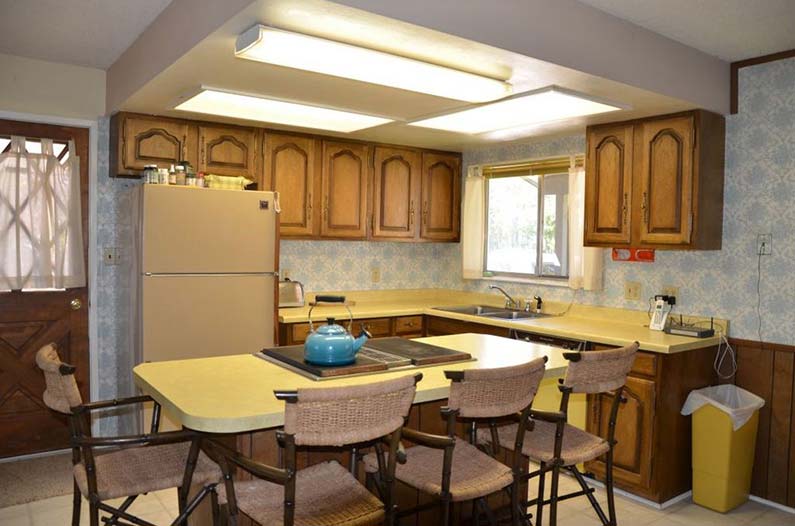
Before photo of the kitchen with yellow Formica countertops and wood cabinets.
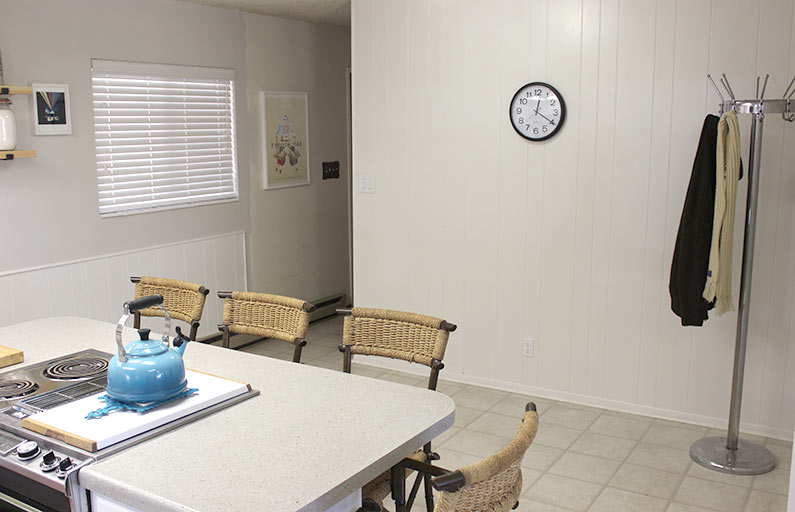
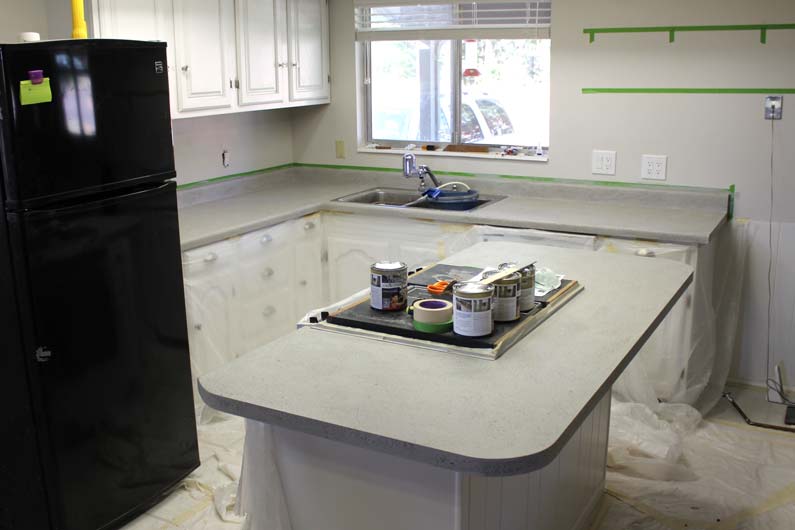
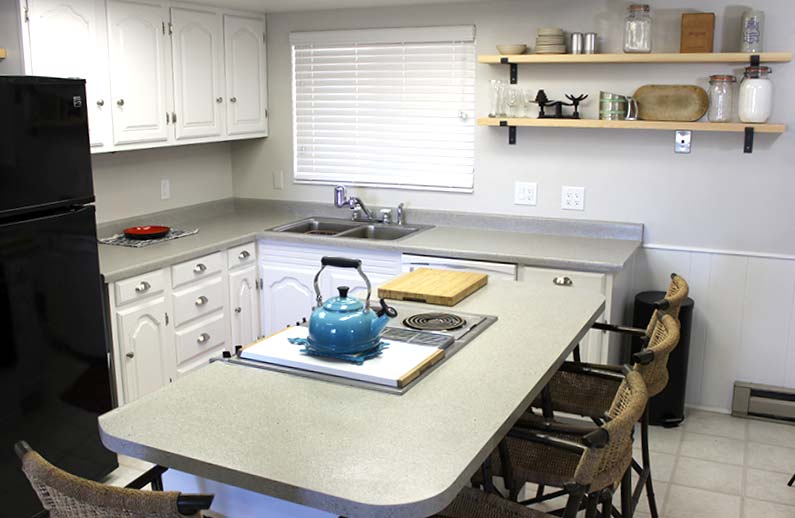
Below is the after photo… looks better and definitely brighter. I'm so happy with how it turned out! Being part Norwegian I am drawn to Scandinavian styling so I knew right from the start I wanted white. I knew it was a “safe”, neutral color and any highlight colors could be placed in so it wasn't so dull. I also like modern farmhouse styling and the fact that this house is in Southern Utah it made sense to try and go that route. I knew I wanted some open shelving so I removed two cabinets and replaced them and really love how it opened up the space.

After photo of the completed kitchen area.
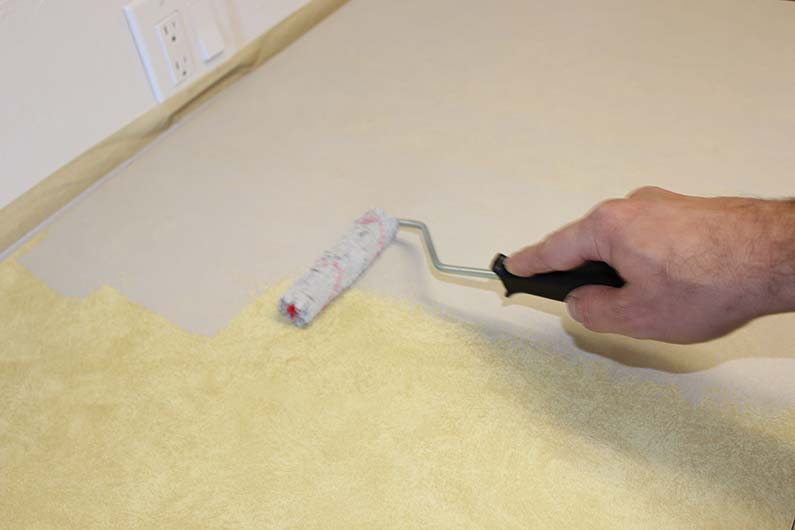
The kitchen nook was wall to ceiling wood paneling and I knew that had to be painted. It took 3 coats of Kilz primer to cover it and then I painted it with paint from Truvalue. Before painting I did sand it and clean it thoroughly with TSP and rinsed it down. Looks way better white! The color I chose was called Snowstorm in satin finish.
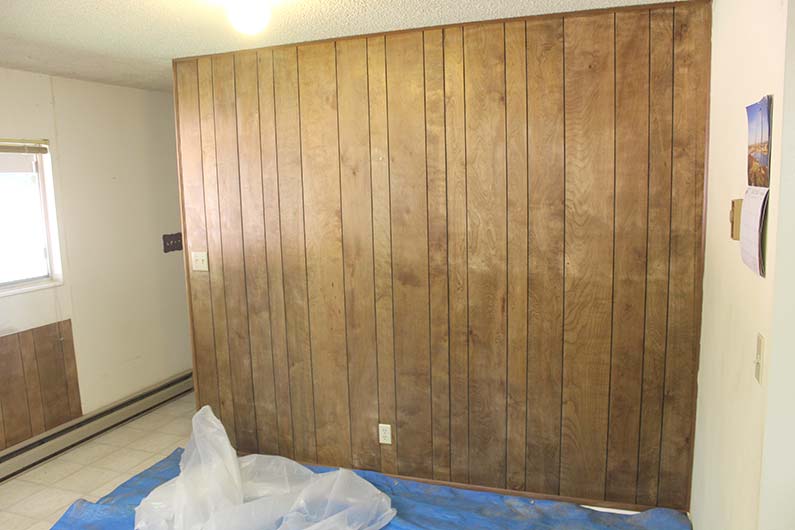
Wood paneled wall needed white paint.
Wood paneled wall painted white
Painting Kitchen Cabinets
The wood cabinets and the counter tops were the two main things to be updated in this kitchen makeover. I cover the counter tops below but kind of skipped covering the painting of the cabinets. The cabinets were a lot of work. You have to remove all cabinet doors and drawers, clean with TSP, sand them really well, clean them again and start priming them, etc. I didn't want to post a bunch of photos of that, but I do have some tips below.
Here's what I have learned by painting the kitchen cabinets.
- Cleaning and sanding are really important. Make sure to do this step well. It takes longer than you think.
- I considered painting the insides of the doors and even the inside of the cabinets but I learned you don't have to paint the inside of your cabinets. If you paint the inside of the cabinets the paint actually makes them stick when closed and you don't want this. It also saves a lot of time by not doing the inside of the cabinets so skip this.
- Make sure you have saw horses available and a couple of long 2×4's to lay across so you can lay your cabinet doors on when you go to prime and paint.
- If you have wood cabinets it really does take a minimum of 3 coats of primer to make your last coat of paint be the color you want… in this case Snowstorm white.
- With a kitchen this small one gallon of primer and one gallon of paint was all it took for all 5 coats, (3 primer, 2 paint) for all cabinets and even the island.
- Acrylic paint with a semi gloss finish is durable enough and you don't need Oil based or special alkyd paint to have a durable finish. I researched a lot and was set on getting an alkyd paint because of this article but after reading reviews at HomeDepot.com it seemed like a huge pain (read the reviews). I knew the paint needed to be scrubable for cleaning and they had scrubable water-based paint at a local TruValue. It looks great and is really durable!
- New cabinet hardware makes a big difference. I went with stainless 3/8 inset hinges, knobs and cup pools.
- Reinstalling the cabinet doors by myself was easier than I thought it would be. My cabinets are inset on the inside so I used a paint stir stick underneath them for the spacing, lined them up, drilled new holes and then screwed them in. If you can get help of course it's a lot easier.
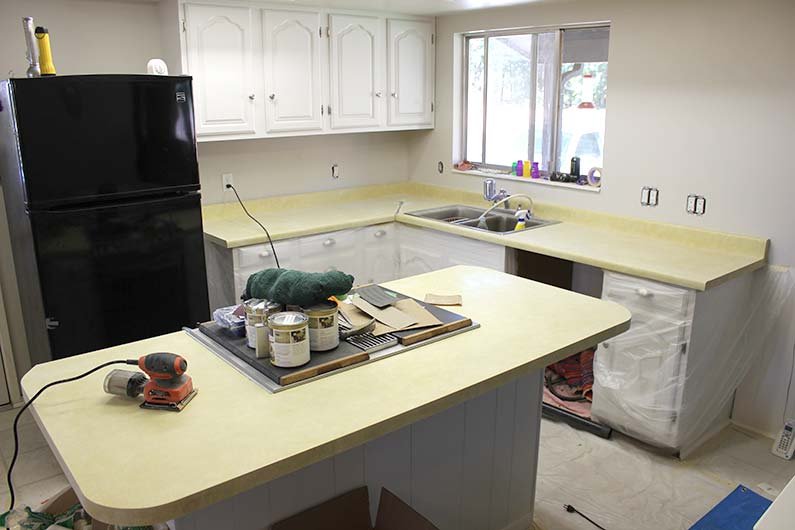
Refinishing Formica Countertops (DAICH SpreadStone Onyx Fog)
The yellow Formica countertops for me were the most important thing to update of this kitchen. I am ok with some yellow but really loathed how much yellow was in the kitchen and dining room. It definitely wasn't a selling point as you see the kitchen right when you walk into this house. So I wanted to brighten things up and make it feel more open and fresh. Replacing counter tops can be very expensive and time consuming so because we were on a tight budget looked into every method of updating things and luckily found DAICH's SpreadStone. DAICH SpreadStone is a counter top refinishing system where you sand and paint old-outdated Formica. From reviews I read online people seemed to be mostly happy with their outcomes. So, had to try it.
I knew from more negative reviews of the product that people hadn't properly prepared the surface of their Formica. Being accustomed to doing proper prep work I knew issues other people had were not an issue. And you really don't take into account how much prep is involved in doing things right, but I know it's super important to properly clean and sand surfaces so I figured it would work great. And I was right. The final outcome was impressive and after 3 weeks see zero issues with it. SpreadStone is durable and actually very pretty.
I read that some people had completely resurfaced their counter tops with DAICH SpreadStone over a weekend, starting Friday night. I thought it would be that fast because the counter tops were in really good shape for being 40 or so years old. There were no burn marks or really any cracks that I saw… but I decided to investigate the 45 degree seam on the left of the sink more and started fiddling with it with a screwdriver and realized that I needed to pull up some of the loose damaged pieces. This added about 3 days to the entire process because I had to sand it, lay down spackle, wait 24 hours, sand, re-spackle, sand… etc. The SpreadStone kit comes with an instructional CD with videos on it and they show how to fix cracks like this. I was just hoping I didn't have to go through that, but that wasn't the case. It was OK though as it looks way better without the visible seam now. I like that I spent the extra time to do it right. Looks good!
First Step: Prep Work
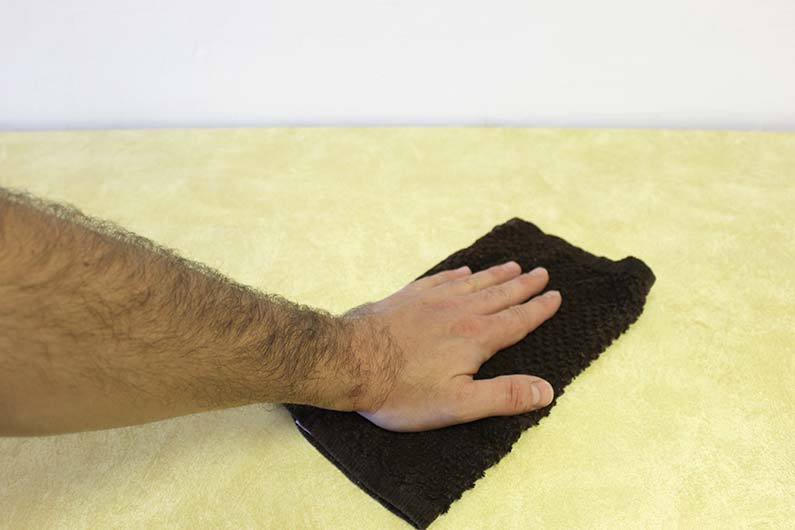
Sanding your Formica thoroughly is super important so you create a rough surface for the first coat of pain to adhere to. The Spreadstone kit comes with a heavy duty piece of sand paper (I believe 80 grit) they want you to use, but I want down to TruValue and bought 80 grit sandpaper for my orbital sander… and I sanded the hell out of it! I made sure there were no glossy areas left on the Formica. I know doing the sanding properly would create a surface the new coat of SpreadStone would really stick to. This I think is super important. Make sure to wear the dust mask included with the kit while doing this as dust gets everywhere fast. You don't want to breathe in plastic!
Sanding surface of Formica… really good with an orbital sander.
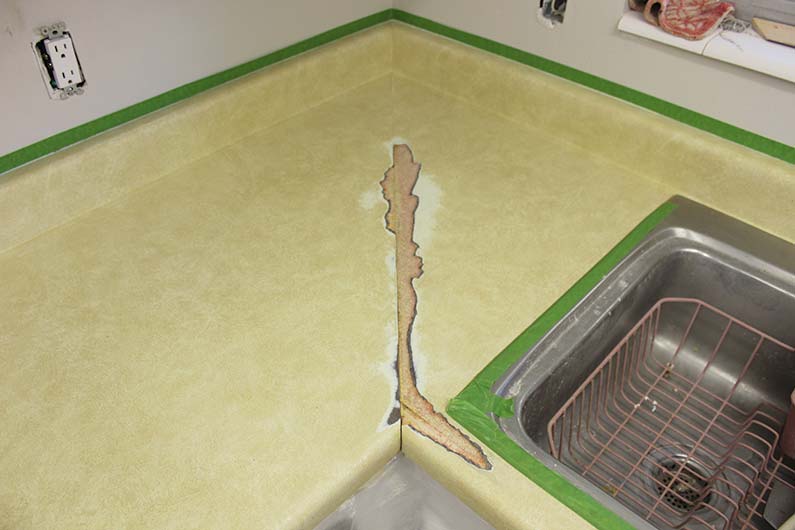
Spot I had to repair on the Formica.
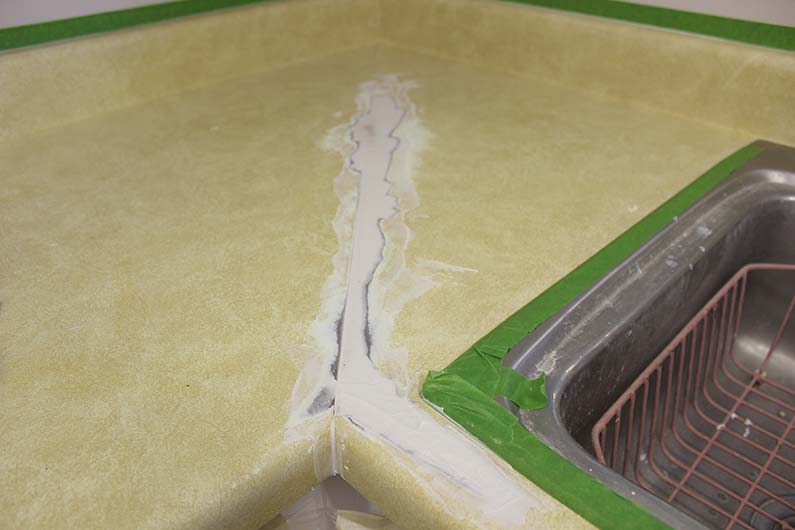
Putting spackle down on the damaged Formica
After sanding be sure to vacuum up loose particles and then wipe it down multiple times.
Important Note: Before sanding I cleaned the entire surface of the Formica down with TSP in hot water (with a clean rag) and then went over the entire surface again with plain hot water (with another clean rag) to rinse any residue of the TSP left behind off. Its important to remove any grease or residue before sanding so you start with a really clean surface. Then after you sand you need to do the same thing. Make sure the surface is really clean before starting to mask off any areas you don't want painted.
Step Two: Starting to Paint
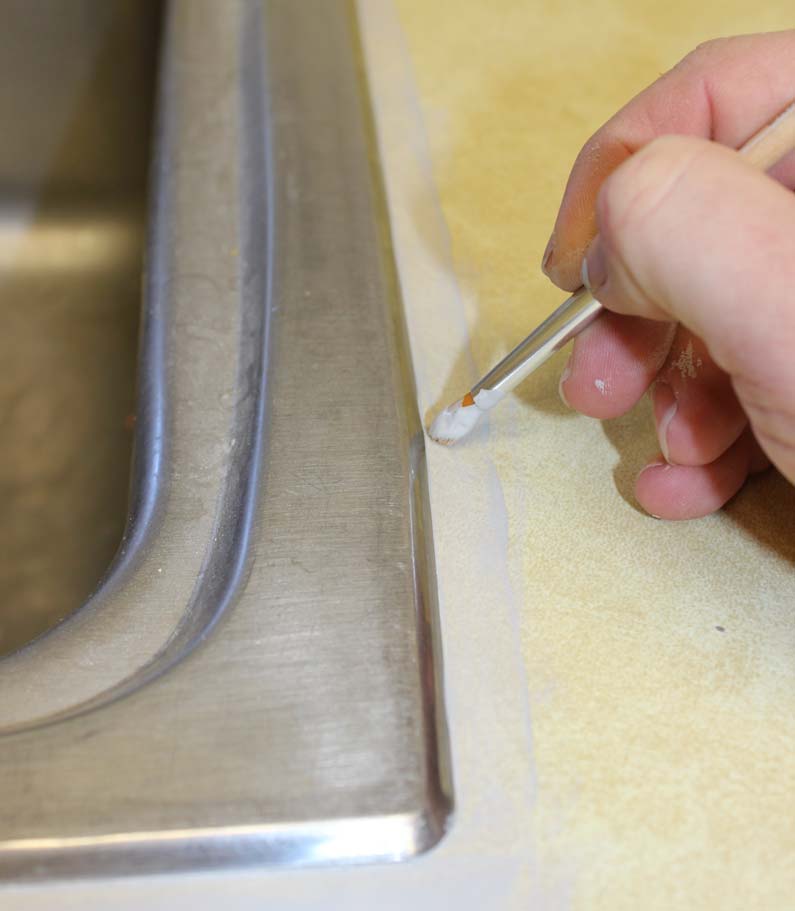
I actually did mask off the sink with Frog Tape and it really didn't stick to the surface of the stainless sink. So I just ripped it off and decided to use a small (really small) paint brush to do the edges. Lifting up the sink wasn't really an option because it didn't move, so painting really carefully was my best option.
After you paint around your sink or any edges that are delicate like the stove (which mine is in the middle of the island) you can start covering the main areas with the first coat of the paint. The DAICH SpreadStone kit comes with a roller that you use to roll on the first paint coat. It actually worked good and was easy to do. As soon as the yellow was completely covered it already looked a million times better. After your first coat of paint you need to wait and put on another coat to make sure everything is evenly covered. The time you have to wait is given in the instruction… I think it was an hour or two.
First coat of SpreadStone Onyx Fog is already making things look better.
After you get the main top coat of the DAICH SpreadStone paint on and it dries… you can now start applying the 2nd and 3rd stone flake paint. Make sure you stir the stone paint really well before starting. It's usually settled in the can and you really have to stir it with a paint stick to get it mixed well. In the instructions it says to use the roller that is included to apply this stone paint coating but when I tried it it didn't work well. So I decided to paint it on with a brush. I felt this worked way better and allowed me to dab areas that seemed to have less stone flakes in it. I did the entire counter top surface with a brush and it worked out awesome. Immediately you can get a feel for what the actual color will look like. You won't see the awesome pops of minerals show up until it dries and you start sanding the mineral coating down.
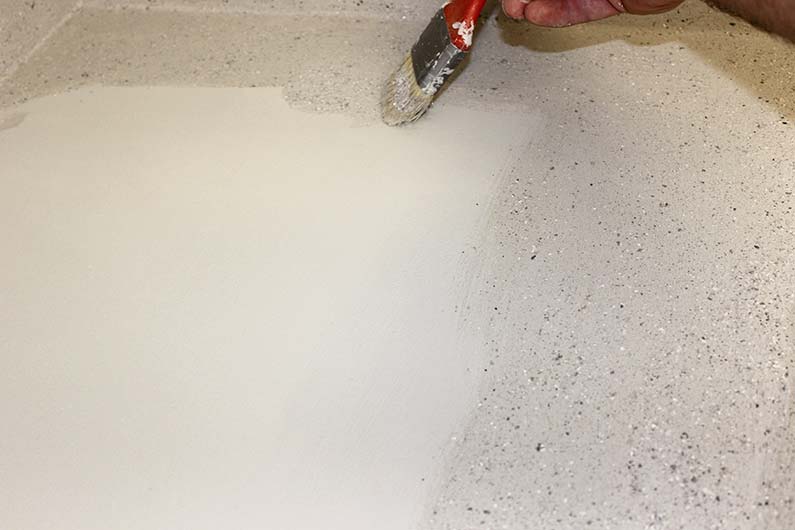
Second step in DAICH SpreadStone is the actual paint with stone (mineral) flakes in it.
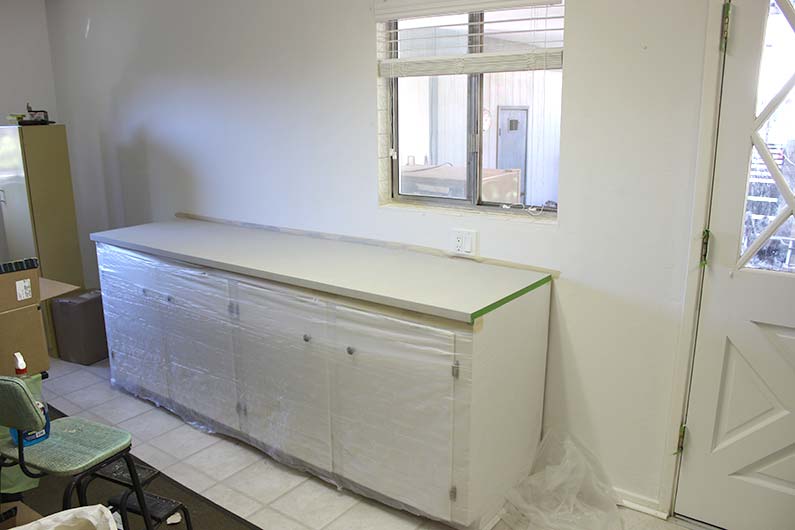
In the photo below I've applied both coats of the mineral stone paint and have sanded. After sanding I noticed there were areas that had less mineral specks in it so I did do spot coats in certain areas. This added to the length of time this took but I really wanted to do things right. After sanding you might find this too. If its important to you make sure you spend the extra time to make sure its perfect. I couldn't imagine finishing this project in a weekend. It took me more like 6 days to finish, but I also did a counter top in the dining room at the same time. You can see the other counter top below.
After the SpreadStone mineral coat has dried and you've sanded it down you can apply the last coat of clear which really makes the counter tops pop. Again, I had to do touch up spots of the mineral coating in several areas after sanding because (I had more) area needed more specks of minerals. You sand the mineral coat and the specks of minerals really come out. In the Onyx verson there is black, silver, copper specks in the coating. It looks really cool. I did apply the clear coat with the second roller because it worked better than a brush. You apply two coats of clear for the final step.
The finished counter tops in Spreadstone Onyx
Finished kitchen looks brighter, cleaner and modern.
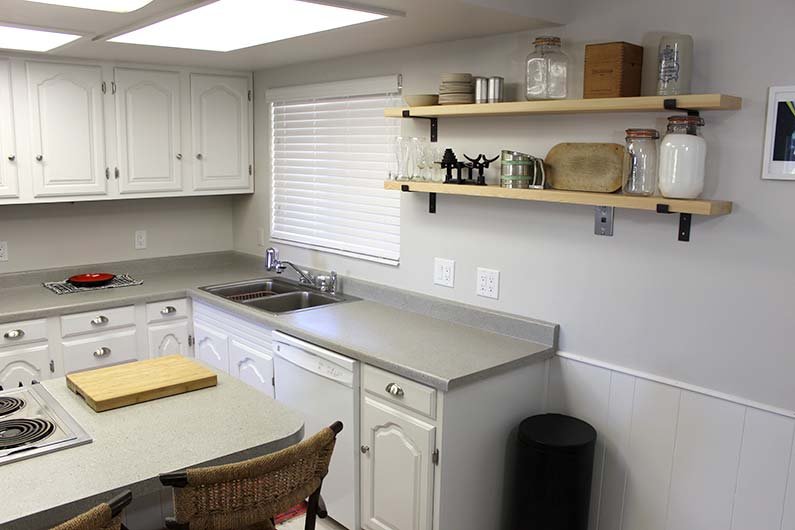
Open Shelving
I love open shelves and wanted to have at least one in the kitchen so decided to take down an entire cabinet on the right of the kitchen window. It really depends on your layout but I knew I wanted the kitchen to feel more open and when you walk into the kitchen from the living room the cabinet I removed was really blocking the openness of the kitchen. I didn't hesitate to rip the cabinet down and it immediately opened the place up. I knew the shelves would be mostly decorative but it has made such a positive difference.
I thought a lot about shelf brackets, length, thickness, color and finally decided on having natural wood shelves held up by rustic metal brackets my mom found on eBay. I love how it came out. I got rid of all wood paneling, wood cabinets, but wanted pops of natural wood and the shelves complete the look perfectly.
The wood for the shelves was purchased at my local Truvalue. I found nice 2x8x10 planks of wood that I had cut down for me into 6 7/8″ by 5′ pieces.
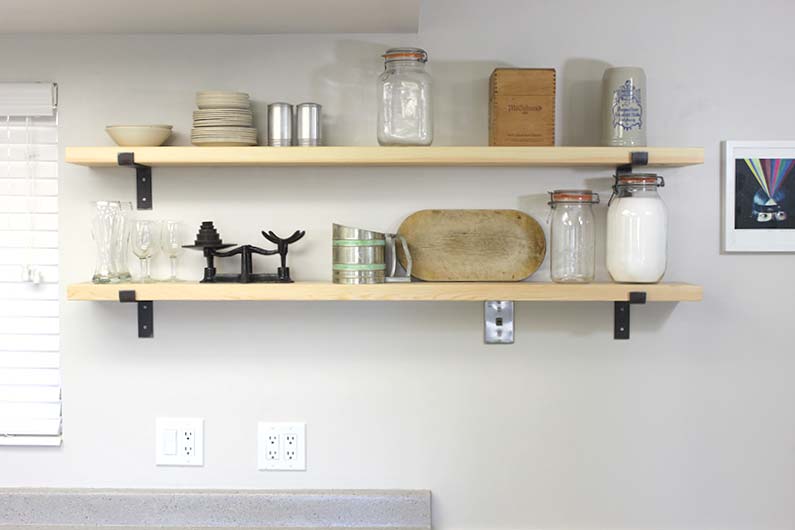
Open Shelving with rustic metal brackets
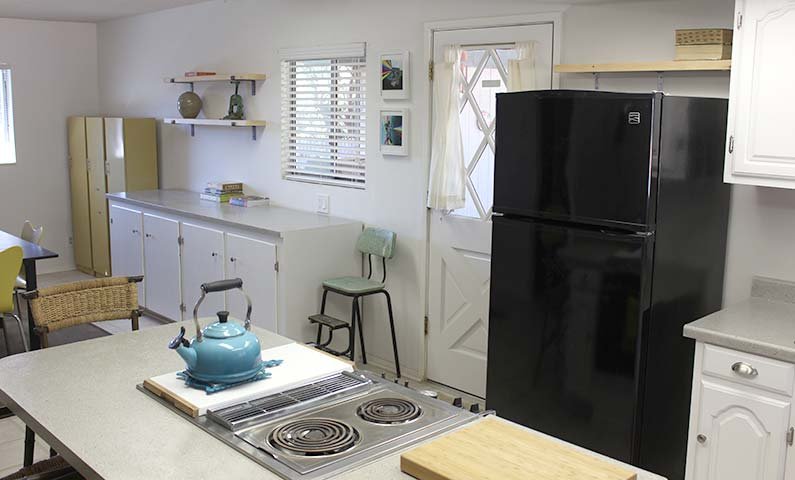
To connect the dining room with the kitchen a bit more I realized the open shelves should be carried on from the kitchen to the dining room. I did take down a cabinet that was over the old fridge and replaced it with one single open shelf. I then put up two shorter open shelves over the counter top in the dining room. I left all shelves natural wood and just applied a thin coat of polyurethane to seal them.
Results & Thoughts
Like I've said before, I really love how it all came out. It feels new, refreshing, cleaner and a lot bigger. It was a hard project to tackle by myself for sure. You have to use your kitchen every day and when its completely torn apart for weeks on end it is super stressful. I am super happy now its completed.
You can spend tens of thousands of dollars on a kitchen makeover and that wasn't an option here. You can really go off the deep end with choosing appliances, hardware and custom stuff. Luckily the kitchen only really needed a dishwasher and a fridge… and luckily I had a replacement fridge in storage. I had the fridge otherwise a stainless or white fridge would have made more sense. You make do with what you have a lot of the time so its not a huge issue for me. The stove is a late 70's, early 80's downdraft Jenn-Air and to replace that it's $2,500+ so the project could have jumped to $4k real quick. If it works there's no need to replace it in my mind, unless it makes you depressed like the yellow counter tops and wood cabinets did to me. But I actually like vintage stuff so I like the stove and didn't feel it needed to go.
The entire project too around a month to complete. That was with painting the entire dining room, replacing every light switch, thermostats, electric outlets, painting the door, putting in 3 new window blinds, etc. I did everything myself and if I had a 9-5 job it would have taken half a year. Luckily I work for myself and can take on DIY projects like this.
Anyway, I'd love to hear what you think. I was going to list where I got a lot of the products but that might have to come later in an update if anyone cares. Let me know!
Update: Here's the Pinterest board I created for inspiration for the project: Kitchen Make-over
I also will create a list of where I got everything if there's any questions on this post.


Looks good Jeff! I like the fresh white with gray, plus wood tones. And I especially like that you reused what you already had and left that cool vintage Jenn-air stove.
Thanks Cathy! Hope some day you get to actually see it in person.
I’m wondering how your countertops are holding up? I bought the Daich Coatings kit but I’m afraid it won’t be durable?
Hi Brikena, they are holding up great actually! I was worried too, but with daily use they are looking like the day I refinished them. And I still like it. One package completed the entire kitchen and part of the dining room cabinet tops… and I bought two. So now I’m thinking of refinishing the two bathroom countertops in the Daich coating. If you don’t want to replace your countertops this is the way to go. Thanks for the comment btw… I wasn’t sure anyone even saw this. Ha
Oh that’s so nice to hear 😀 I recently painted my kitchen cabinets and they turned out great but now my old Formica countertops look so sad lol!! I did a lot of research and the Daich Coatings product sounded the most promising. I bought the kit last November 😂 and I have been too chicken to try it. Thank you so much for your response and I absolutely love your kitchen transformation 😍 I’m trying to update mine, it was so bad including an ugly green wallpaper with flowers and leopard print 😆 I felt a lot better once I stripped that off the walls 😂 then I painted my cabinets now I just need to do the countertops and flooring.
-Thanks again 😀
Hi Brikena, yes, recoating your countertops sounds hard, especially if you read the DAICH instructions provided, but it’s actually pretty easy. It just takes a few days. And I know how hard it is to redo your kitchen when you use it every day. It was such a pain to redo my kitchen as I was redoing most of it. I was so glad when it was over. And now I love how it looks and glad I tackled the project. I would have responded sooner but I finally redid the bathroom like I mentioned I wanted to do and it took all weekend. I’ll hopefully post some photos soon… But it turned out great and I’m happy with it. I want to put in new flooring too but I’m afraid it will be more work than its worth. Anyway, thanks for your comment. I hope you can get to your countertops soon. Best of luck!
Thanks for the great step by step hints. I’m looking at doing my counters in the spring and am glad to hear it holds up well.
Did you hand sand the mineral coat? Or did you do that with a sander as well? I have my kit on order and I am so excited!
Hi Rebekah, yeah the minerals need to be sanded because they are pretty gritty. I can’t imagine not sanding that layer, but I think if you wanted your countertops to be really bumpy you could skip that step. I sanded mine before applying any of the paint, or basecoat, then after the paint goes on you let it dry, then apply the coating with the minerals in it. Then you sand that down as smooth as you like it to be. Even after sanding your countertops will be faintly bumpy, but it feels nice. Actually when you sand it it brings out some of the colors like copper and silver in the minerals and looks really nice.
I did use a small orbital electric sander to speed the sanding process up, but was careful not to over sand because you’ll go right through to the original layer which you don’t want. If that happens though you can use some of the 1st step paint to touch up.
Anyway, hope it goes smoothly and turns out well for you! 🙂