
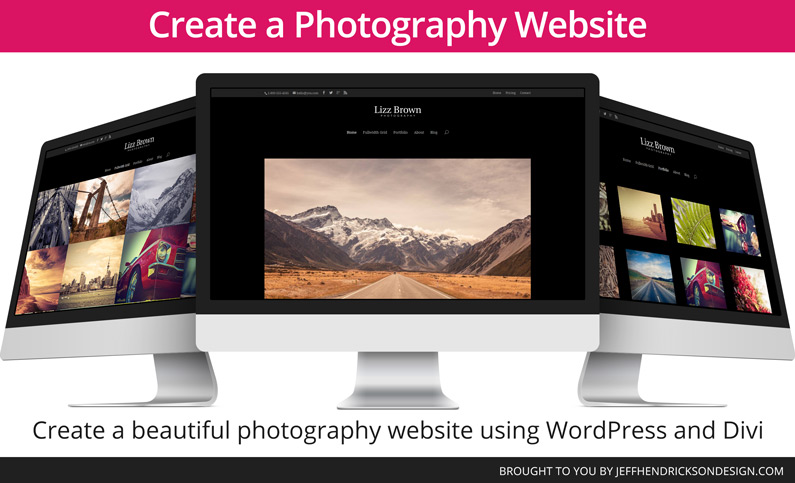
In this post I'll show you how to create a WordPress powered photography website using the Divi theme from Elegant Themes.
Sometimes when a WordPress theme isn't labelled as a certain type of theme it's hard to see it fitting your specific needs as a photographer. Like, off the bat you'd think that Divi is geared towards more corporate design firm type businesses when you check out the demo. It doesn't exactly scream “I'm perfect for your photography business”. But, because of it's many features it can be set up in a way to mimic some of the many popular themes that are labelled as a “photography theme”.
Before I get started I've set up a demo site showing what the completed website will look like.
To get started you need to download and install Divi to your WordPress installation.
Once Divi is installed you should go through the Divi Theme Options panel and after that the Customize section to further customize the theme.
Setting up Divi Theme Options
Uploading your logo: Because the theme has a dark black background your logo needs to be light colored and most preferably white. It's best to use a PNG format so that you can have transparency within your logo, but if you don't know how to create a PNG with transparency you can of course use a GIF or JPEG on a black background (#000000). Once you have your logo you can upload it into the Logo field. Btw, I used one of the free photographer logos I'm giving away.
The next important step is including the custom CSS for your site (Located at the bottom of this post). Fill out all the other options as you see fit.
Because I know a lot of photographers like having their photos on black backgrounds I've chosen to make the theme dark. Divi is really a light theme by default. That means white is primarily used overall so you have to do some extra work to get the theme completely black. Luckily I've gone through the trouble of creating the required CSS code to change the theme from being white, to being black for you. All you have to do is copy and paste the CSS code in the custom CSS box in the Theme Options main page. Again, the custom CSS to add is at the bottom of this post.
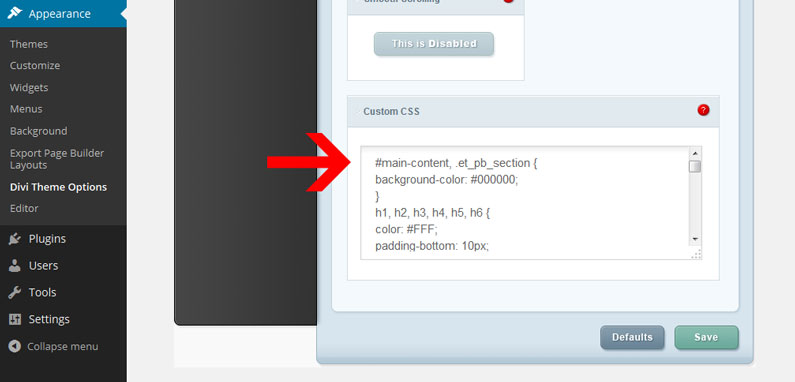
Paste the custom CSS code into the this box under Divi Theme Options and click save.
Setting Up Theme Customization
After you're done with the theme options panel you can move onto the the Customize section under Appearance (Appearance > Customize). Here you can customize the way the header looks, the sites colors, fonts used, etc.
Setting Up Theme Colors
The first option in the Customize section for Divi is the Colors options panel. Here you'll want to set some of the colors to black so your site is uniform. In the demo I have the Secondary navigation background set to a lighter grey but you can make it any color you want including black if you don't want it to stand out. Even though I have custom CSS making the background black, I have black (#000000) set for the background as you can see below.

Under Appearance > Customize you'll want to set some of the colors to black as you can see from this graphic.
Setting Up Header Style
Click on Theme Settings to expand the options panel. You can see the options I have enabled below. You can of course choose to not display the top secondary navigation that sits above your logo, but for the demo I enabled it and chose to display a phone number, email address and social icons. So these items show up on a dark background I chose “Light” for the primary navigation text color. I also wanted the logo to be centered so choose “Centered” in the Header Style drop down menu.
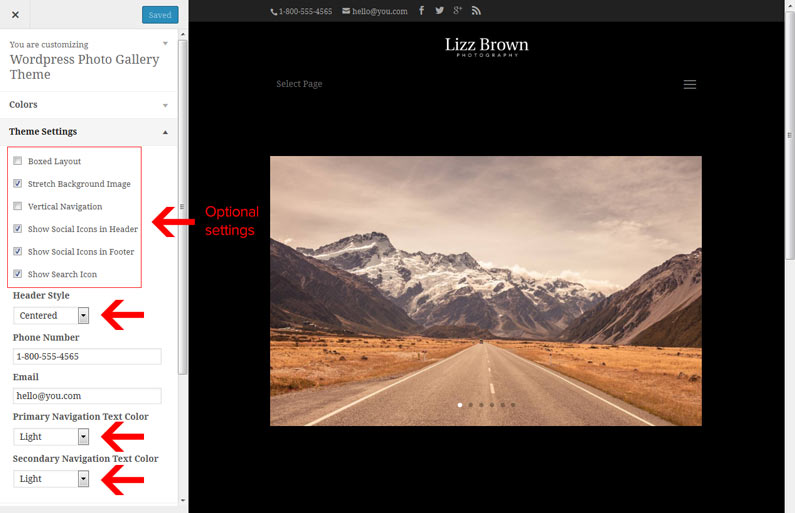
Under Appearance > Customize you can set up further details of your website including how the header looks, fonts, colors, etc.
Video: Theme Options & Customize Settings
Setting Up Pages
On the demo I have several pages I created that I will use for certain things, such as a page dedicated for the homepage, a pricing page, contact page as well as a couple different galleries. If you're building a brand new site it's best to create these pages first so you can designate a homepage and then move on to creating menus etc.
Setting Up the Homepage:
I have the homepage displaying a static page, which is a gallery. To set that up you need to go to Settings > Reading and choose the page you created a gallery for. You can have the homepage display any page you want, but for the demo I chose a slideshow gallery.

Choose a page you created that uses a gallery to display a slideshow on your homepage.
Video: Setting Up the Homepage Gallery
Here is a short video showing how to set up the gallery on the homepage. It's easier to describe in a video. If it's hard to see, click on the square icon on the bottom right to expand the video to full screen.
Video: Setting Up a Gallery Page
Video: Setting Up a Full Width Portfolio Grid
Video: Setting Up a Pricing Page
Video: Setting Up the Contact Page
Video: Setting Up the About Me Page
Video: Setting Up the Blog Section
Video: Editing Your Websites Footer Section
Custom CSS
Add the custom CSS below to the Custom CSS box within the Divi Epanel (Appearance > Divi Theme Options). It's on the main page at the bottom. Just copy what's highlighted in red.
#main-content, .et_pb_section {
background-color: #000000;
}
h1, h2, h3, h4, h5, h6 {
color: #FFF;
padding-bottom: 10px;
line-height: 1em;
font-weight: 500;
}
body {
color: #FFF;
}
#et-footer-nav {
background-color: rgba(0,0,0,0.05);
}
.et_pb_blog_grid .et_pb_post {
margin: 0px 60px 60px 0px;
width: 280px;
border: 1px solid #000;
float: left;
padding: 19px;
background-color: #000;
word-wrap: break-word;
}
.et_pb_toggle_open {
padding: 20px;
background: none repeat scroll 0% 0% #000000;
}
.et_pb_toggle_close {
background-color: #000000;
padding: 20px;
}
.et_pb_toggle_title:before {
content: “”;
position: absolute;
right: 0px;
font-size: 16px;
color: #FFF;
}
.et_pb_toggle_close h5.et_pb_toggle_title {
color: #FFF;
}
.et_pb_toggle_open h5.et_pb_toggle_title {
color: #FFF;
}
.et_pb_pricing_content li {
color:#333
}
Do You Want to Sell Photo Prints?
Divi is fully compatible with WooCommerce so to start selling prints all you need to do is install the free WooCommerce plugin and set it up. I actually set up another demo site to show WooCommerce in action with Divi if you want to check it out.
WooCommerce by itself will allow you to sell prints directly to the public, but what if you want to sell prints privately to a client you just had a session with? Well, luckily WooThemes has just released a new extension for WooCommerce called WooCommerce Photography that allows photographers to create a private storefront just for single clients. It works like photo proofing software where clients have private access to their photos and can choose which ones they'd like prints of. Unfortunately it seems like it is a bit of a disappointment if you read some of these comments. The plugin is brand new though so I'm sure over time WooThemes will work out the details and grow it to an all-in-one solution professional photographers can really use.
I still think that professional online proofing software is the way to go for professionals. Not only have these online solutions been around longer, but they aren't usually hosted by you… meaning you don't have to worry if your hosting is fast enough, or secure enough or if you have enough disk space to handle storing lots of digital photos. They also have many more helpful features, such as the ability to send your orders directly to a printer making it a lot faster and convenient.
After several hours of research and talking with friends I found that ShootProof looks like it's the best photo proofing solution out there at the moment. They offer a bunch of nice features and do not take any commission for photos you sell. That means you keep 100% of your profit. You should check them out if you are looking for a professional proofing solution. Because like I mentioned, I just don't think WordPress plugins for photographers to sell prints privately is really there yet. Selling prints publicly is another thing, but for photographers who want to create a private proofing section of their website, WordPress isn't the solution in my opinion. Hopefully that will change over time, but for now if I were a professional photographer I'd go with a hosted solution such as ShootProof.
![]() BTW, If you'd like 1GB of free photo storage when you sign up to ShootProof, use promo code: nuvru
BTW, If you'd like 1GB of free photo storage when you sign up to ShootProof, use promo code: nuvru
Conclusion
Hopefully this guide was helpful and makes you realize that yes, Divi can be included as a WordPress theme for photographers. It does take some tweaking if you want to have a black theme, but if you prefer a lighter theme and want to have a white background then you can skip the custom CSS stuff and dive right in.
Since Divi's release it has been updated several times so maybe they'll add the option of having an all black theme in the future. Elegant Themes is really good about releasing updates and I've really enjoyed the udpates Divi has seen. They are really working hard to make it better and better with each release.
If you aren't a customer of Elegant Themes yet and on the fence about if it's worth it to sign up all I can say is that I've been a customer for over 5 years now and continually renew my membership because they're a great company and are continually creating new themes, updating old ones and releasing new plugins. The release of Divi was really a big jump for them and is now considered their flagship theme. Their new, easy-to-use page builder really sets them apart from every other page builders out there as well. Compared to Visual Composer it's a dream.
And when you think about the fact that a yearly membership which gives you access to 87 different themes and costs about the same amount as a single theme elsewhere, it's really a no-brainer. You can use their themes on unlimited websites you own, and if you choose the developer plan, others people's site you develop for them as well. That's why I opted for the developer license… that and I have access to their plugins which are also great.
They just released a really cool plugin called Monarch that makes social sharing of your content better. I am using it here on my website right now. The social buttons on the left are powered by Monarch. You get access to all their plugins with a developer license.
So yeah, I think Divi is a great theme. I'm using it to power this website and I think it can make a great photography website too. Don't you agree?


Great post Jeff! Thanks for sharing. The videos really made it easier to understand.